Write the Java code to map steady state hypothesis on a network
This tutorial shows how to write Java code to perform downscaling of global data and map the results to an existing network. For instance, if you know the total amount of load consumption in a given network, downscaling allows you to find for each unitary load a new active power set point \(P0\).
In this tutorial, we will import networks in CIM-CGMES format and map time series representing, for each network, their global active power generation set point and their global active power consumption set point. This mapping on generators and on loads will be performed using a mapping script in a DSL format. Then, we will output the results in CSV files.
- What will you build?
- What will you need?
- How to complete this tutorial?
- Create a new project from scratch
- Configure the maven pom file
- Configure Metrix
- Import the networks from CIM-CGMES files
- Import the time series from CSV file
- Load mapping DSL script
- Perform mapping on each network
- Output new networks
- Summary
- Going further
What will you build?
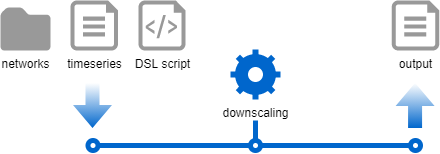
Input data is quite simple and is stored in three files:
- A folder containing zip archives for CIM-CGMES networks ;
- A CSV file for time series ;
- And a Groovy file for the DSL script.
These files are imported to load a set of networks, a time series store and a DSL loader. All of these objects are then used in the downscaling process to map time series on network elements. You will also note that output generation is performed at the same time as the mapping for better performances.
What will you need?
- About 1 hour
- A favorite text editor or IDE
- JDK 1.11 or later
- You can also import the code straight into your IDE:
How to complete this tutorial?
Please refer to the load flow tutorial for this section.
Create a new project from scratch
Create a new Maven’s pom.xml file in downscaling/initial with the following content:
<?xml version="1.0" encoding="UTF-8"?>
<project xmlns="http://maven.apache.org/POM/4.0.0"
         xmlns:xsi="http://www.w3.org/2001/XMLSchema-instance"
         xsi:schemaLocation="http://maven.apache.org/POM/4.0.0 http://maven.apache.org/xsd/maven-4.0.0.xsd">
    <modelVersion>4.0.0</modelVersion>

    <parent>
        <groupId>com.powsybl</groupId>
        <artifactId>powsybl-parent</artifactId>
        <version>3</version>
        <relativePath/>
    </parent>

    <artifactId>powsybl-downscaling</artifactId>
    <name>Downscaling</name>

    <properties>
        <maven.exec.version>1.6.0</maven.exec.version>
        <slf4j.version>1.7.22</slf4j.version>
        <powsybl.core.version>5.1.1</powsybl.core.version>
    </properties>
</project>
Configure the maven pom file
In the pom.xml, add first the following lines in the <properties> section to make it possible to run the future main class through Maven:
<exec.cleanupDaemonThreads>false</exec.cleanupDaemonThreads>
<exec.mainClass>powsybl.tutorials.downscaling.Downscaling</exec.mainClass>
When you’ll have created the Downscaling class and its main function, you’ll then be able to execute your code through:
$> mvn clean install exec:java -Dexec.args="/tmp/"
Also, configure the pom.xml file in order to use a configuration file taken in the classpath, instead of the one
that is global to your system:
<build>
    <plugins>
        <plugin>
            <groupId>org.codehaus.mojo</groupId>
            <artifactId>exec-maven-plugin</artifactId>
            <configuration>
                <systemProperties>
                    <systemProperty>
                        <key>powsybl.config.dirs</key>
                        <value>${project.build.directory}/classes</value>
                    </systemProperty>
                </systemProperties>
                <classpathScope>compile</classpathScope>
            </configuration>
        </plugin>
    </plugins>
</build>
Now, we’ll add a few required maven dependencies:
com.powsybl:powsybl-config-classic: to provide a way to read the configurationorg.slf4j:slf4j-simple: to provide an implementation ofslf4j.com.powsybl:powsybl-iidm-apito work with networks.powsybl-iidm-api,powsybl-cgmes-conversionandpowsybl-triple-store-impl-rdf4jto load CIM-CGMES networks.powsybl-time-series-apito work with time series.powsybl-metrix-mappingto perform downscaling. Note that the repository powsybl-metrix has to be compiled locally as no release are available.
Note: PowSyBl uses slf4j as a facade for various logging framework, but some APIs we use in PowSyBl use log4j, which is not compatible with slf4j, making it necessary to create a bridge between the two logging system.
Add the following dependencies to the pom.xml file:
<dependencies>
    <dependency>
        <groupId>com.powsybl</groupId>
        <artifactId>powsybl-config-classic</artifactId>
        <version>${powsybl.core.version}</version>
    </dependency>
    <dependency>
        <groupId>org.slf4j</groupId>
        <artifactId>slf4j-simple</artifactId>
        <version>${slf4j.version}</version>
    </dependency>

    <!-- Network + CGMES -->
    <dependency>
        <groupId>com.powsybl</groupId>
        <artifactId>powsybl-iidm-api</artifactId>
        <version>${powsybl.core.version}</version>
    </dependency>
    <dependency>
        <groupId>com.powsybl</groupId>
        <artifactId>powsybl-iidm-impl</artifactId>
        <version>${powsybl.core.version}</version>
    </dependency>
    <dependency>
        <groupId>com.powsybl</groupId>
        <artifactId>powsybl-cgmes-conversion</artifactId>
        <version>${powsybl.core.version}</version>
    </dependency>
    <dependency>
        <groupId>com.powsybl</groupId>
        <artifactId>powsybl-triple-store-impl-rdf4j</artifactId>
        <version>${powsybl.core.version}</version>
        <exclusions>
            <exclusion>
                <artifactId>logback-classic</artifactId>
                <groupId>ch.qos.logback</groupId>
            </exclusion>
        </exclusions>
    </dependency>

    <!-- Mapping -->
    <dependency>
        <groupId>com.powsybl</groupId>
        <artifactId>powsybl-time-series-api</artifactId>
        <version>${powsybl.core.version}</version>
    </dependency>
    <dependency>
        <groupId>com.powsybl</groupId>
        <artifactId>powsybl-metrix-mapping</artifactId>
        <version>1.0.0-SNAPSHOT</version>
        <scope>compile</scope>
    </dependency>
</dependencies>
Configure Metrix
We have configured this tutorial so as to use a locally defined config.yml file.
Edit the file named config.yml at the location downscaling/initial/src/main/resources.
Start the configuration by writing:
metrix:
  ignoreEmptyFilter: true
The metrix configuration namespace will allow you to set up mapping behavior. The ignoreEmptyFilter option allows to continue without crashing when a filter in the DSL script returns an empty result (more on this later).
Import the networks from CIM-CGMES files
In this tutorial, the provided networks are in CIM-CGMES format. Each one is loaded from a zip archive containing all its related data. We provide two example archives in the downscaling/complete/src/main/resources/networks directory. Both are open-source and adapted from CGMES conformity tests.
CGMES_smaller.zipis based on the Small Grid Base Case Test Configuration from CGMES Conformity Assessment, where we imagine that it represents Great Britain’s network. The geographical information is just needed for the mapping.CGMES_bigger.zipis based on the Real Grid Test Configuration from CGMES Conformity Assessment, where we imagine that it represents France’s network. Here too, the geographical information is just needed for the mapping.
First, create Downscaling class, with a main method and a logger.
import org.slf4j.Logger;
import org.slf4j.LoggerFactory;

public class Downscaling {

    private static final Logger LOG = LoggerFactory.getLogger(Downscaling.class);

    public static void main(String[] args) {

    }

    /**
     * Private constructor
     */
    private Downscaling() {}
}
Prepare the networks directory
Create the downscaling/initial/src/main/resources/networks directory. You must deposit all the CIM-CGMES archives you want to manipulate inside.
Write network import code
Create a Set<Network> loaded from each zip file of the networks directory :
Set<Network> networks = new HashSet<>();
final URL networksDir = Downscaling.class.getClassLoader().getResource("networks");
Files.walk(Paths.get(networksDir.toURI()))
    .filter(Files::isRegularFile)
    .filter(f -> f.toString().endsWith(".zip"))
    .forEach(zipFile -> {
        try {
            final Network network = Network.read(zipFile.toFile().toString());
            networks.add(network);
        } catch (Exception e) {
            LOGGER.error("Could not load network from file [" + zipFile.getFileName().toString() + "]", e);
        }
    });
Since we have logged any error occurring during networks import, you should be able to understand problems more easily.
Import the time series from CSV file
We load time series from a simple CSV file. While other, more reliable and shareable formats are supported by Powsybl, the CSV format allows you to have a direct insight into the raw data you manipulate.
The downscaling/complete/src/main/resources/ts-test.csv file contains test time series data you can use to run this tutorial. You can copy it to downscaling/initial/src/main/resources.
In the provided time series store, we use the time series names to map them to network equipments. The time series are identified by their names (column header in the CSV file):
- Generation time series: each time series has a named composed of its country code and its energy production type. For instance, French nuclear power is referenced by the
NUCLEAR_FRtime series. - Load time series: only one time series is needed to represent active power consumption in each country. For instance, British load consumption is referenced by
LOAD_GBtime series.
If mapping process cannot find a time series for a given equipment, the code throws an error.
Write time series import code
In Powsybl, time series are grouped and accessed in data-structures called TimeSeriesStore. Create an InMemoryTimeSeriesStore (time series data are actually present directly in JVM memory) and populate it with the ts-test.csv file.
final InMemoryTimeSeriesStore store = new InMemoryTimeSeriesStore();
InputStreamReader isr = new InputStreamReader(Downscaling.class.getClassLoader().getResourceAsStream("ts-test.csv"));
final BufferedReader reader = new BufferedReader(isr);
store.importTimeSeries(reader);
Load mapping DSL script
Metrix integration mapping defines a DSL in groovy language that allows you to script actions that will be executed during Metrix execution. Please refer to mapping DSL documentation for further information.
A TimeSeriesDslLoader data structure needs to be built to load the DSL script:
final Path mappingFilePath = Paths.get(Downscaling.class.getClassLoader().getResource("mapping.groovy").toURI());
TimeSeriesDslLoader dslLoader;
try (Reader reader = Files.newBufferedReader(mappingFilePath)) {
    dslLoader = new TimeSeriesDslLoader(reader, mappingFilePath.getFileName().toString());
}
A look at the DSL loading script
The DSL loading script is in groovy format. It will be executed by the mapping operation and its content defines what will be actually done.
On top of groovy language, Metrix integration defines a Domain Specific Language (or DSL) that allows you to quickly define operations relative to network’s mapping. The script is run once per network, here is its content script explained:
import com.powsybl.iidm.network.EnergySource

// Retrieve the current network country
country = network.getCountries().iterator()[0]

// Iterate over all possible energy sources
for (eSource in EnergySource.values()) {
    // Run the mapToGenerators function : allows to visit all generators
    // and to define the specifics of the mapping operation to perform
    mapToGenerators {
        timeSeriesName eSource.toString() + '_' + country.toString() // name of the time series to map
        distributionKey {
            generator.maxP // Distribution key : what value should be used to ponderate the global value repartition on generators
        }
        filter {
            generator.energySource == eSource // Filter : only map on selected generators
        }
    }
}

// Run the mapToLoads function : allows to visit all loads
mapToLoads {
    timeSeriesName 'LOAD_' + country.toString()
    distributionKey {
        load.p0
    }
}
Perform mapping on each network
Next, we iterate over each network to map the matching time series on its generators and loads. The code is called into the following loop:
for (final Network network : networks) {
    // ...
}
Prepare time series to be mapped
We make the hypothesis that each network expands on one and only one country. Using this information in the network API, we can prepare the names of all the time series in the storer used for the mapping.
Country country = network.getCountries().iterator().next();
Set<String> tsNames = new HashSet<>();
Streams.stream(network.getGenerators())
    .map(Generator::getEnergySource)
    .distinct()
    .forEach(eSource -> tsNames.add(eSource.toString() + "_" + country.toString()));
tsNames.add("LOAD_" + country.toString());
Prepare mapping parameters
Metrix integration mapping is highly parameterizable. Prepare inputs for the mapping execution:
final MappingParameters mappingParameters = MappingParameters.load();
final ComputationRange computationRange = new ComputationRange(tsStore.getTimeSeriesDataVersions(), 1, 1);
final TimeSeriesMappingConfig mappingConfig = dslLoader.load(network, mappingParameters, tsStore, computationRange);
mappingConfig.setMappedTimeSeriesNames(tsNames);

// Initialize mapping parameters
final Range<Integer> pointRange = Range.closed(0, mappingConfig.checkIndexUnicity(tsStore).getPointCount() - 1);
final TimeSeriesMapperParameters tsMappingParams = new TimeSeriesMapperParameters(
    new TreeSet<>(tsStore.getTimeSeriesDataVersions()),
    pointRange,
    true,
    true,
    false,
    mappingParameters.getToleranceThreshold()
);
- Computation range defines all the versions of the time series that need to be mapped. In this tutorial, we only handle
single-versionedtime series. - Point range defines the number of time steps that need to be mapped. Here, we use the whole horizon for all time series (provided time series have the same horizon).
- Mapping parameters object allows to load general mapping behavior parameters, from the
config.ymlfile.
Prepare outputs
We would like to export output CSV files to an output directory. In this tutorial, we define output path as configurable by the main method caller (in main args).
final Path outputPath = Paths.get(args[0]);
Each network downscaling produce an output file and a log file, stored in a separate directory named after the network’s country.
final Path networkOutputDir = outputPath.resolve(country.getName());
Files.createDirectories(networkOutputDir);
Mapping observers
Performing mapping requires to visit all network equipments. Actually, this operation can be very expensive in processor time and we prefer to perform it as little as possible. A naive approach would do the following steps:
- Visit each equipment to map values on it.
- Visit each equipment again to output the mapped value.
Metrix integration mapping allows for a far better strategy, using the Observer pattern. In the mapping process, observers execute custom code each time a equipment gets visited. This way, network is visited only once and all useful operations are performed at the same time.
Here, we use an EquipmentTimeSeriesWriter: writes a new line in a CSV output file each time an equipment is mapped. Note that each time series version is mapped independently: an output file for each version (named <version_name>.csv) is created. In our case, only a version_1.csv file is produced for each country.
TimeSeriesMapperObserver equipmentWriter = new EquipmentTimeSeriesWriter(networkOutputDir);
Execute mapping
Prepare mapping logs and perform actual mapping with a simple call:
TimeSeriesMappingLogger logger = new TimeSeriesMappingLogger();
mapper.mapToNetwork(tsStore, tsMappingParams, Collections.singletonList(equipmentWriter));
logger.writeCsv(networkOutputDir.resolve("mapping.log"));
Output new networks
You can use another type of mapping observer to export the network in addition to the equipments’ mapped values.
We will export to a network.xml file in the country output directory. Both equipments values export and network export will be performed at the same time.
// Prepare observers
final TimeSeriesMapperObserver equipmentWriter = new EquipmentTimeSeriesWriter(networkOutputDir);
final DataSource dataSource = DataSourceUtil.createDataSource(networkOutputDir, "network", null);
final TimeSeriesMapperObserver networkPointWriter = new NetworkPointWriter(network, dataSource);
final ArrayList<TimeSeriesMapperObserver> observers = Lists.newArrayList(equipmentWriter, networkPointWriter);
// Perform mapping
mapper.mapToNetwork(tsStore, tsMappingParams, observers);
Summary
We have learnt how to write Java and Groovy code to run a mapping in a downscaling context. We’ve shown how to load network files in CIM-CGMES format, how to load local CSV time series files, and how to define a mapping DSL script. We have defined what are mapping observers and how to use them to output mapping results in files.
Going further
Learn more about Metrix simulator.